
Shasta Renovation - Dinette Window
There has been considerable discussion of the side dinette windows at the front sides of our Shasta trailers. They are a cool feature of these old trailers but are typically a source for leaks. After a couple of years of consideration I've finished re-installed ours and wanted to document the process. Please note up front, this is what I decided to do, it may work well but it also may not. I haven't even played a trailer restoration expert on TV, much less in real life. Reader beware.
Original Windows
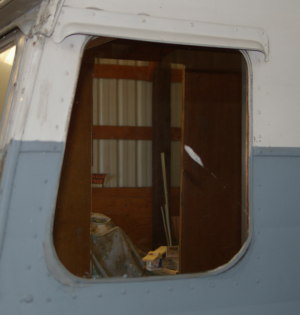
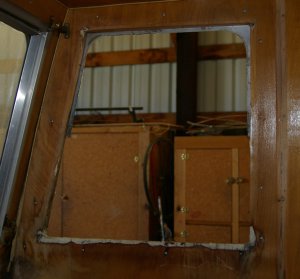
I took pictures of the original installation during tear down. The two below show the left window before disassembly. The outer shows a good number of screws holding the trailer skin to the framing near the window. Also note the molding has shrunk away from the skin. On our trailer a good bit of black tar caulking had been applied in an unsuccessful attempt to prevent leakage. The inside frame is cosmetic.
 |
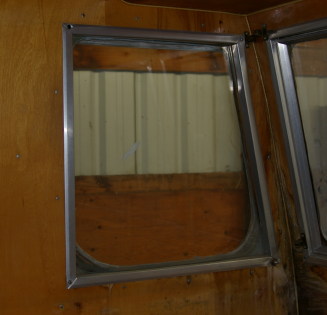 |
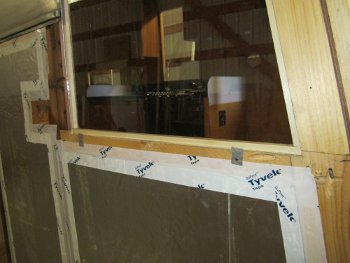
The picture below shows the left window after the inside frame is removed. Not much detail can be seen though. The inside frame and the glass doesn't have the radiused corners that the outside skin has. Note the water damage.
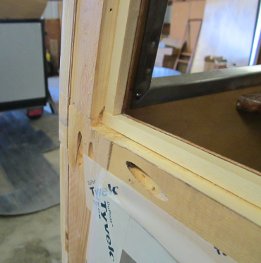
The glass is held against the aluminum skin and the seal around its edge by 1/4" plywood strips nailed around the window frame. The pictures below show these strips. Well they aren't quite 1/4", some are 1/4" and some probably 3/16". Note in the pictures two strips were put on the top. One was used on each side and on this window there was no strip on the bottom.
 |
 |
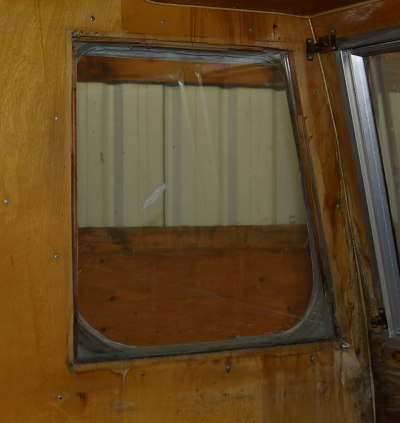
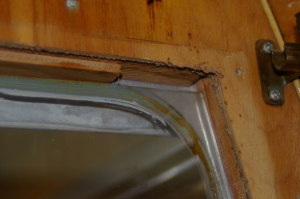
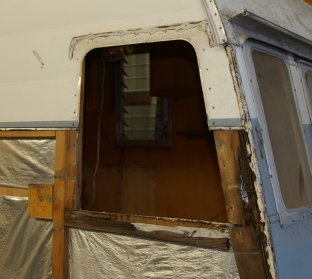
The right Dinette Window was the same. The pictures below show it. Note the damage to the framing under the window. The 1x2 is nearly rotted through.
 |
 |
Renovation
I believe the sealing was dependent on the glass being pressed against the rubber seal which went over the aluminum skin. The picture below shows the original seal on the left. The seal on the right is a replacement, Hehr Standard Glass Seal from Vintage Trailer Supply. I can't see any difference and this looks like a good replacement. A report on the ClassicShasta list verifies this, i.e. "it worked great".

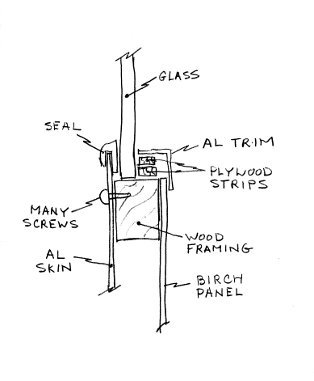
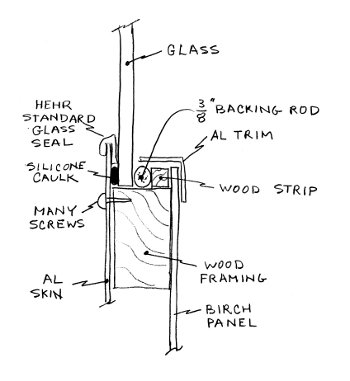
After going in circles for some time I decided on a direction. The drawings below show the original (left) and the new (right).
|
|
The main change is to move the framing back slightly. This gives room below the seal where a bead of caulk (Silicone Caulk in Figure) can be run between the aluminum siding and the glass. I don't think a waterproof seal is possible with the original design, unless the "rubber" seal is caulked to the aluminum and to the glass. Ours runs across a Pittsburgh seam which the "rubber" seal can't accommodate. If you do this, be sure not to increase the opening beyond the screw holes, it would be tough to put the screws through the glass.
Otherwise, I used a 3/8" "Backer Rod" to push the glass against the seal and caulk. This backer rod is a round foam piece used to fill large cracks when sealing buildings. For our use it seemed the right size and gave the right pressure against the glass. The "Wood Strip" was sized to correctly compress the backer rod.
I did leave the opening in the birch plywood smaller than the original, it now sized to just fit the aluminum trim strips. This seemed like a good idea at the time, but it will make it difficult to replace the glass if it breaks. If I did it again I'd trim the plywood to the framing and fill in the space with the "Wood Strip".
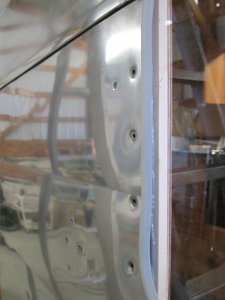
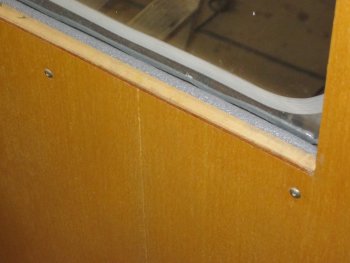
The first picture below shows the window framing, birch plywood and wood strip from the outside. I then placed the glass in the opening, slid under upper skin, and loosely held it in place with two tabs at the bottom (second picture).
 |
 |
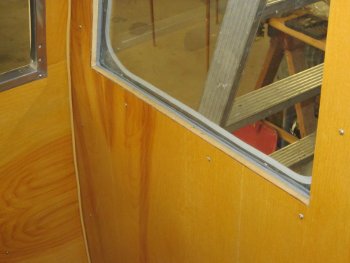
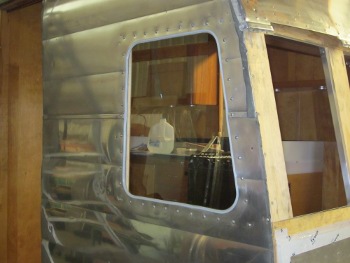
I then squirted caulk onto the glass outside of the seal. On the first I started all the screws, put in the backer rod, then carefully tightened the screws. On the second I tightened all the screws before inserting the backer rod which seemed to work just as well. Note the lack of water damage. Not a surprise since we haven't used it yet, but a nice comparison to the original above.
 |
 |
 |
 |
Squeezing the glass against the skin tends to push some silicone past the seal and into the window area. This wasn't too hard to clean up before it set. I used several paper towels with acetone.
I used silicone rather than another sealant. My choice was between Trempro 644 (silicone RTV) and Trempro 635 (polyurethane), both from Vintage Trailer Supply. I finally selected the silicone. VTS indicates, when describing the 644, While we recommend using only polyurethanes (like TremPro 635 and 636) for most applications, silicone works better in a few applications. Here are a few examples:......2. Use as a glass to metal adhesive (like bedding 1966 and 1967 Airstream Corning glass). Also, in their directions for use of the Hehr Standard Glass Seal VTS says No adhesive is required if glass is snug against the front frame. A small amount of clear silicone sealant can be used to secure it if it comes loose, but is not generally necessary. I hope my logic is valid.
Thus, our dinette windows are back in and retain the original look.
 |
 |